This post is how to run ANSYS Mechanical on TotalCAE Private and Public cloud. See our additional posts on CFX, Fluent, and HFSS/Maxwell.
The primary workflow for ANSYS Mechanical is:
1. Upload your dat file through the TotalCAE Portal (or tsubmit command line) in batch mode. Two clicks to solve. This works identically for all TotalCAE supported systems including on-premise (private cloud) and public cloud. (Alternatively, you can submit through ANSYS Workbench using ANSYS RSM. )
2. Post Process on the Visualization Server using standard ANSYS Graphical User Interface such as ANSYS Workbench.
Using ANSYS Mechanical in Batch Mode with TotalCAE Portal
To use ANSYS Mechanical in batch mode, login to the TotalCAE portal (from your Windows PC with Chrome, or from the Visualization Server and launch Firefox) and select ANSYS. Choose the version of ANSYS Mechanical to run ( in this example version 19.0), then click Browse to upload a model from your machine to the HPC system.
Your data will reside in /work/<username>/ on the cluster. You can do file upload/download through the portal, or by logging into the cluster with SSH to the head node of the system.
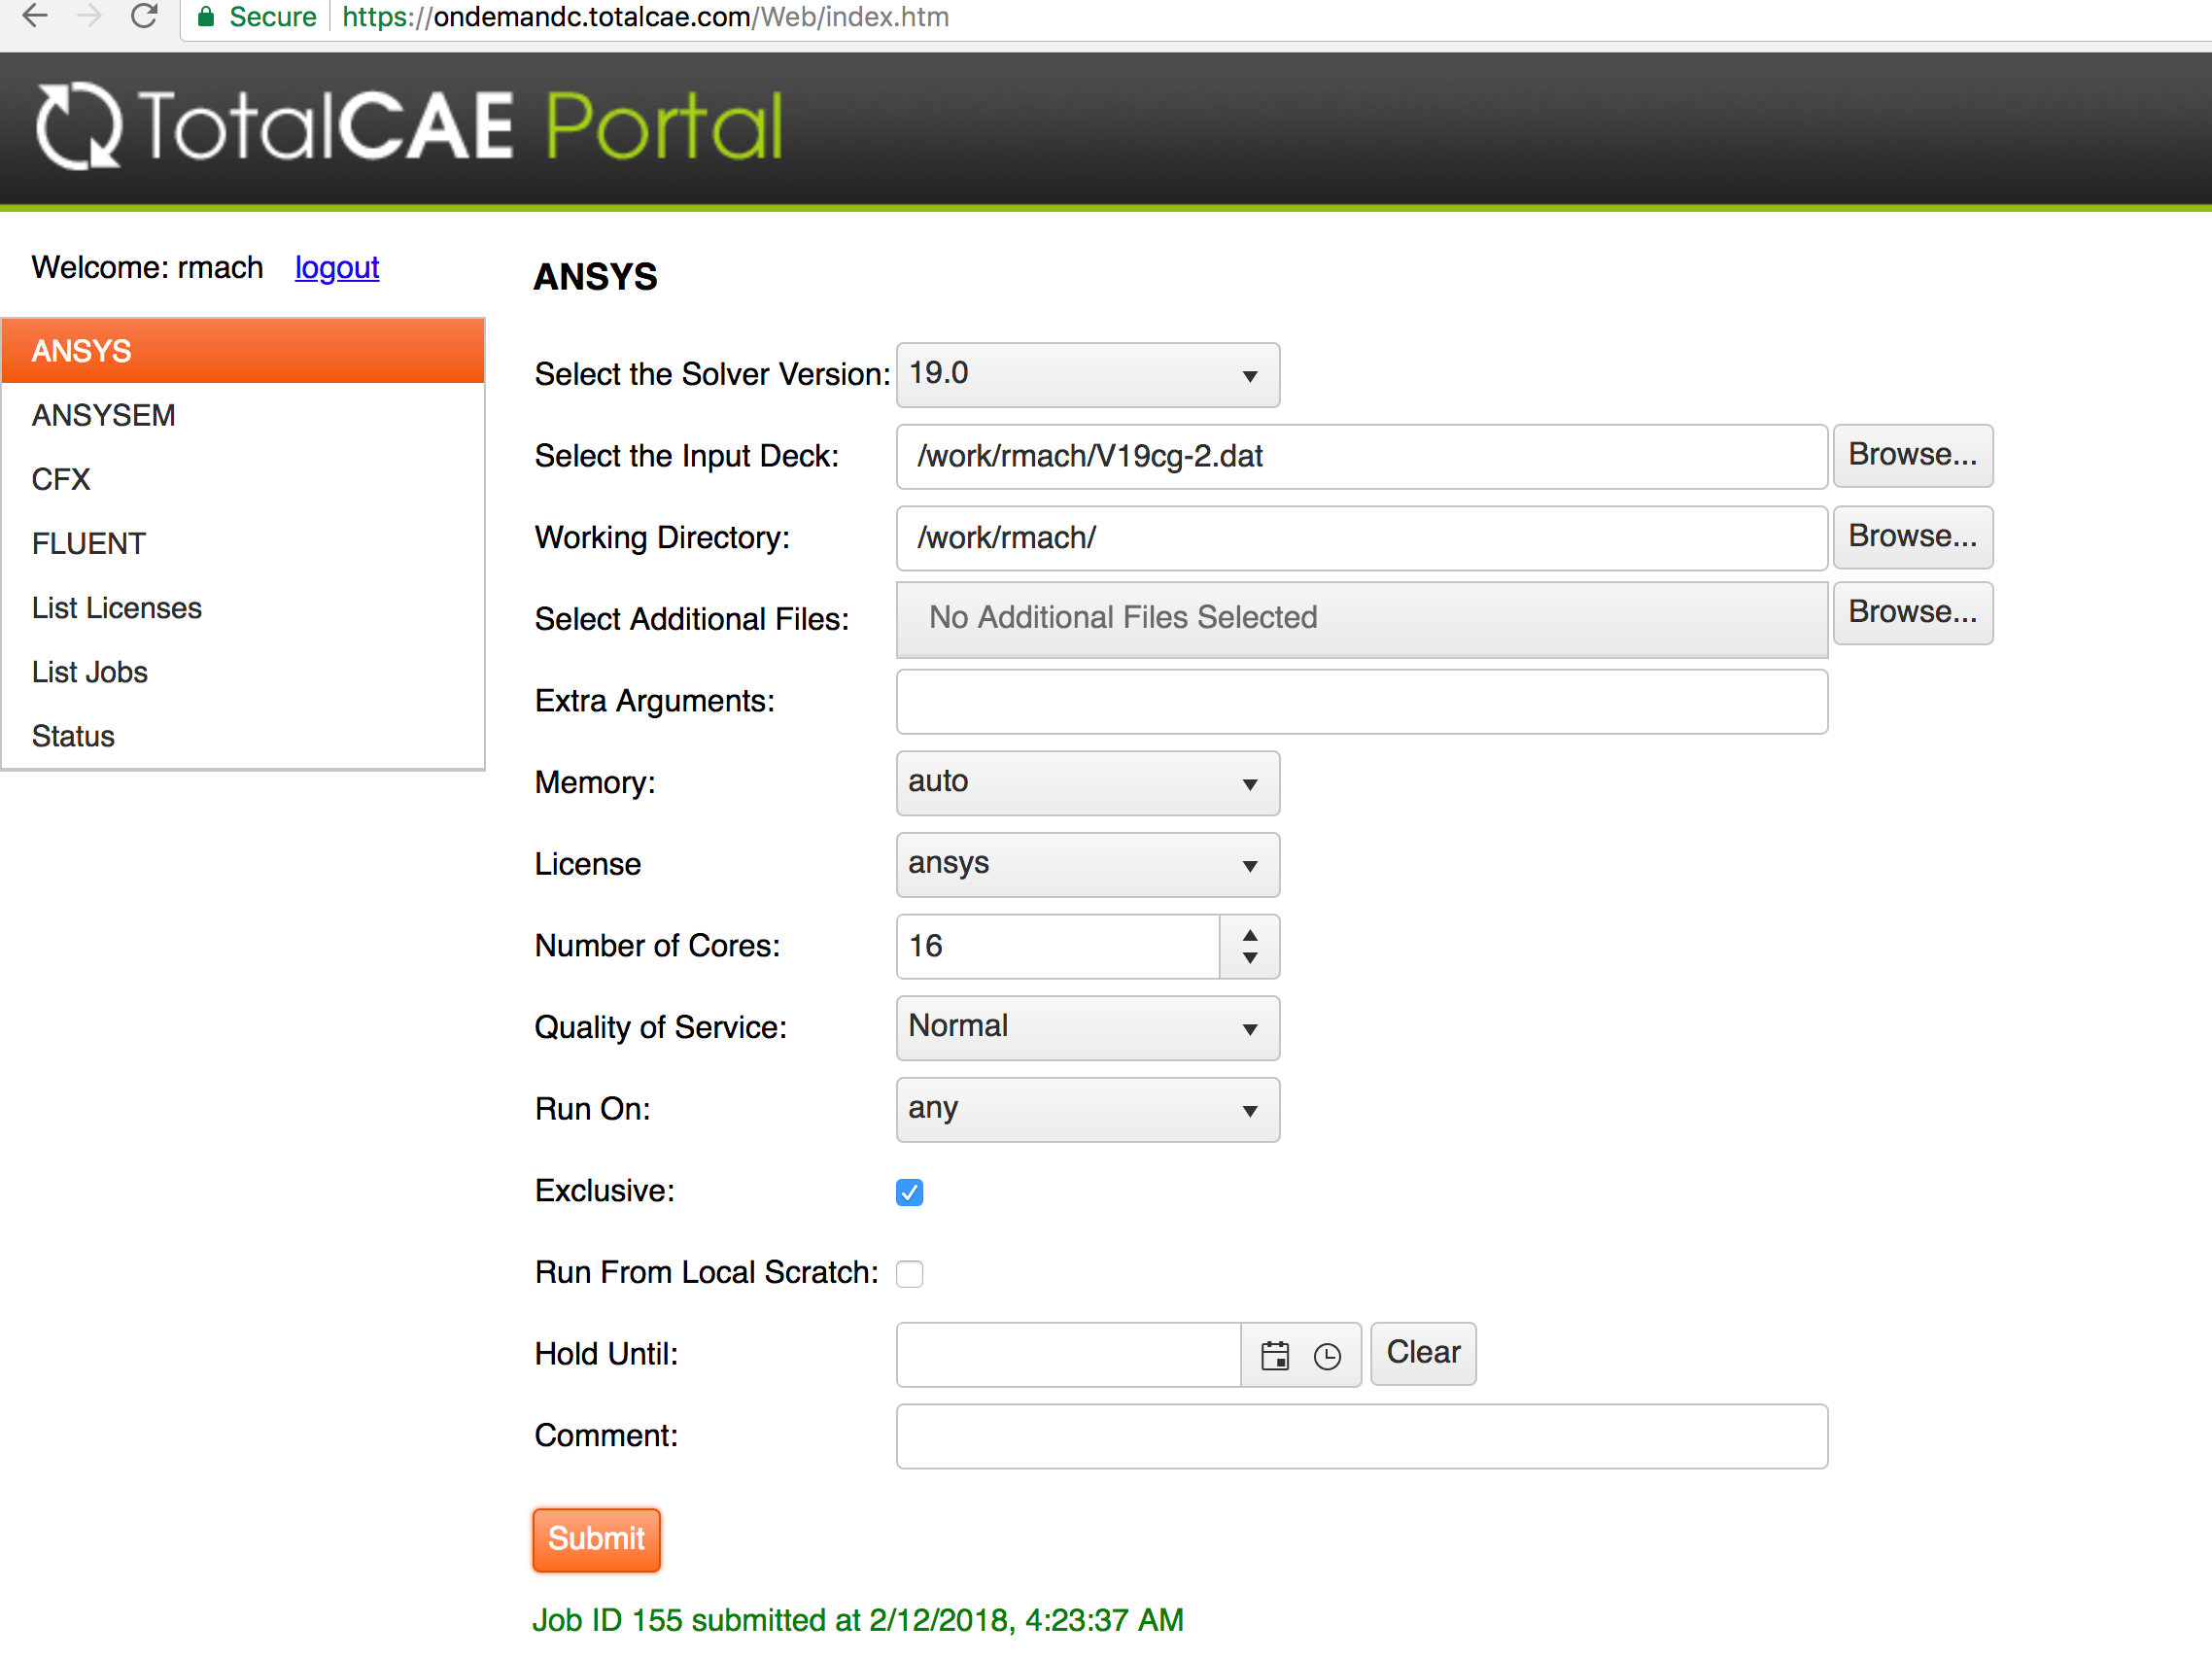
Select the number of cores to run on, and push the “Submit” button. Your job will be put into the batch system. The system will power on nodes to run your job. A job ID will be returned to track your job as shown above.
You can go to the “List Jobs” menu in the portal, and expand the job id to get details on the current job state ( Running, Pending, or Completed) as well as the list of nodes the job ran on, and any comments about the job.
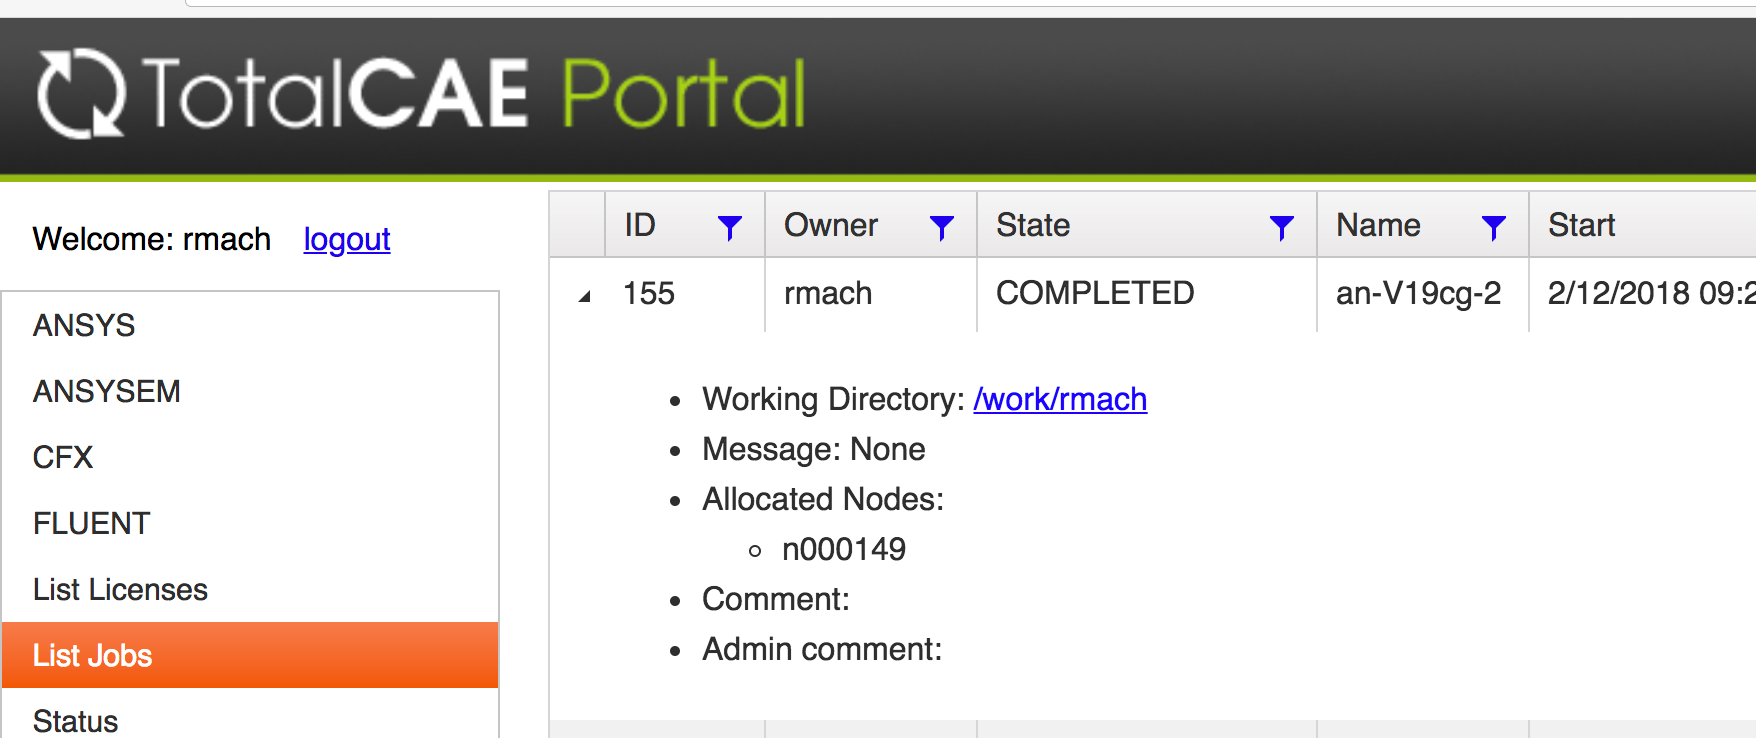
Once the job is completed you will receive an email, then click on the blue link in the “Working Directory” like above to download your job results.
Post Process
You can either download the results back to your workstation, or you can just visualize the results on the cloud via TotalCAE visualization server web page, and bring up ANSYS Fluent in the resulting window).
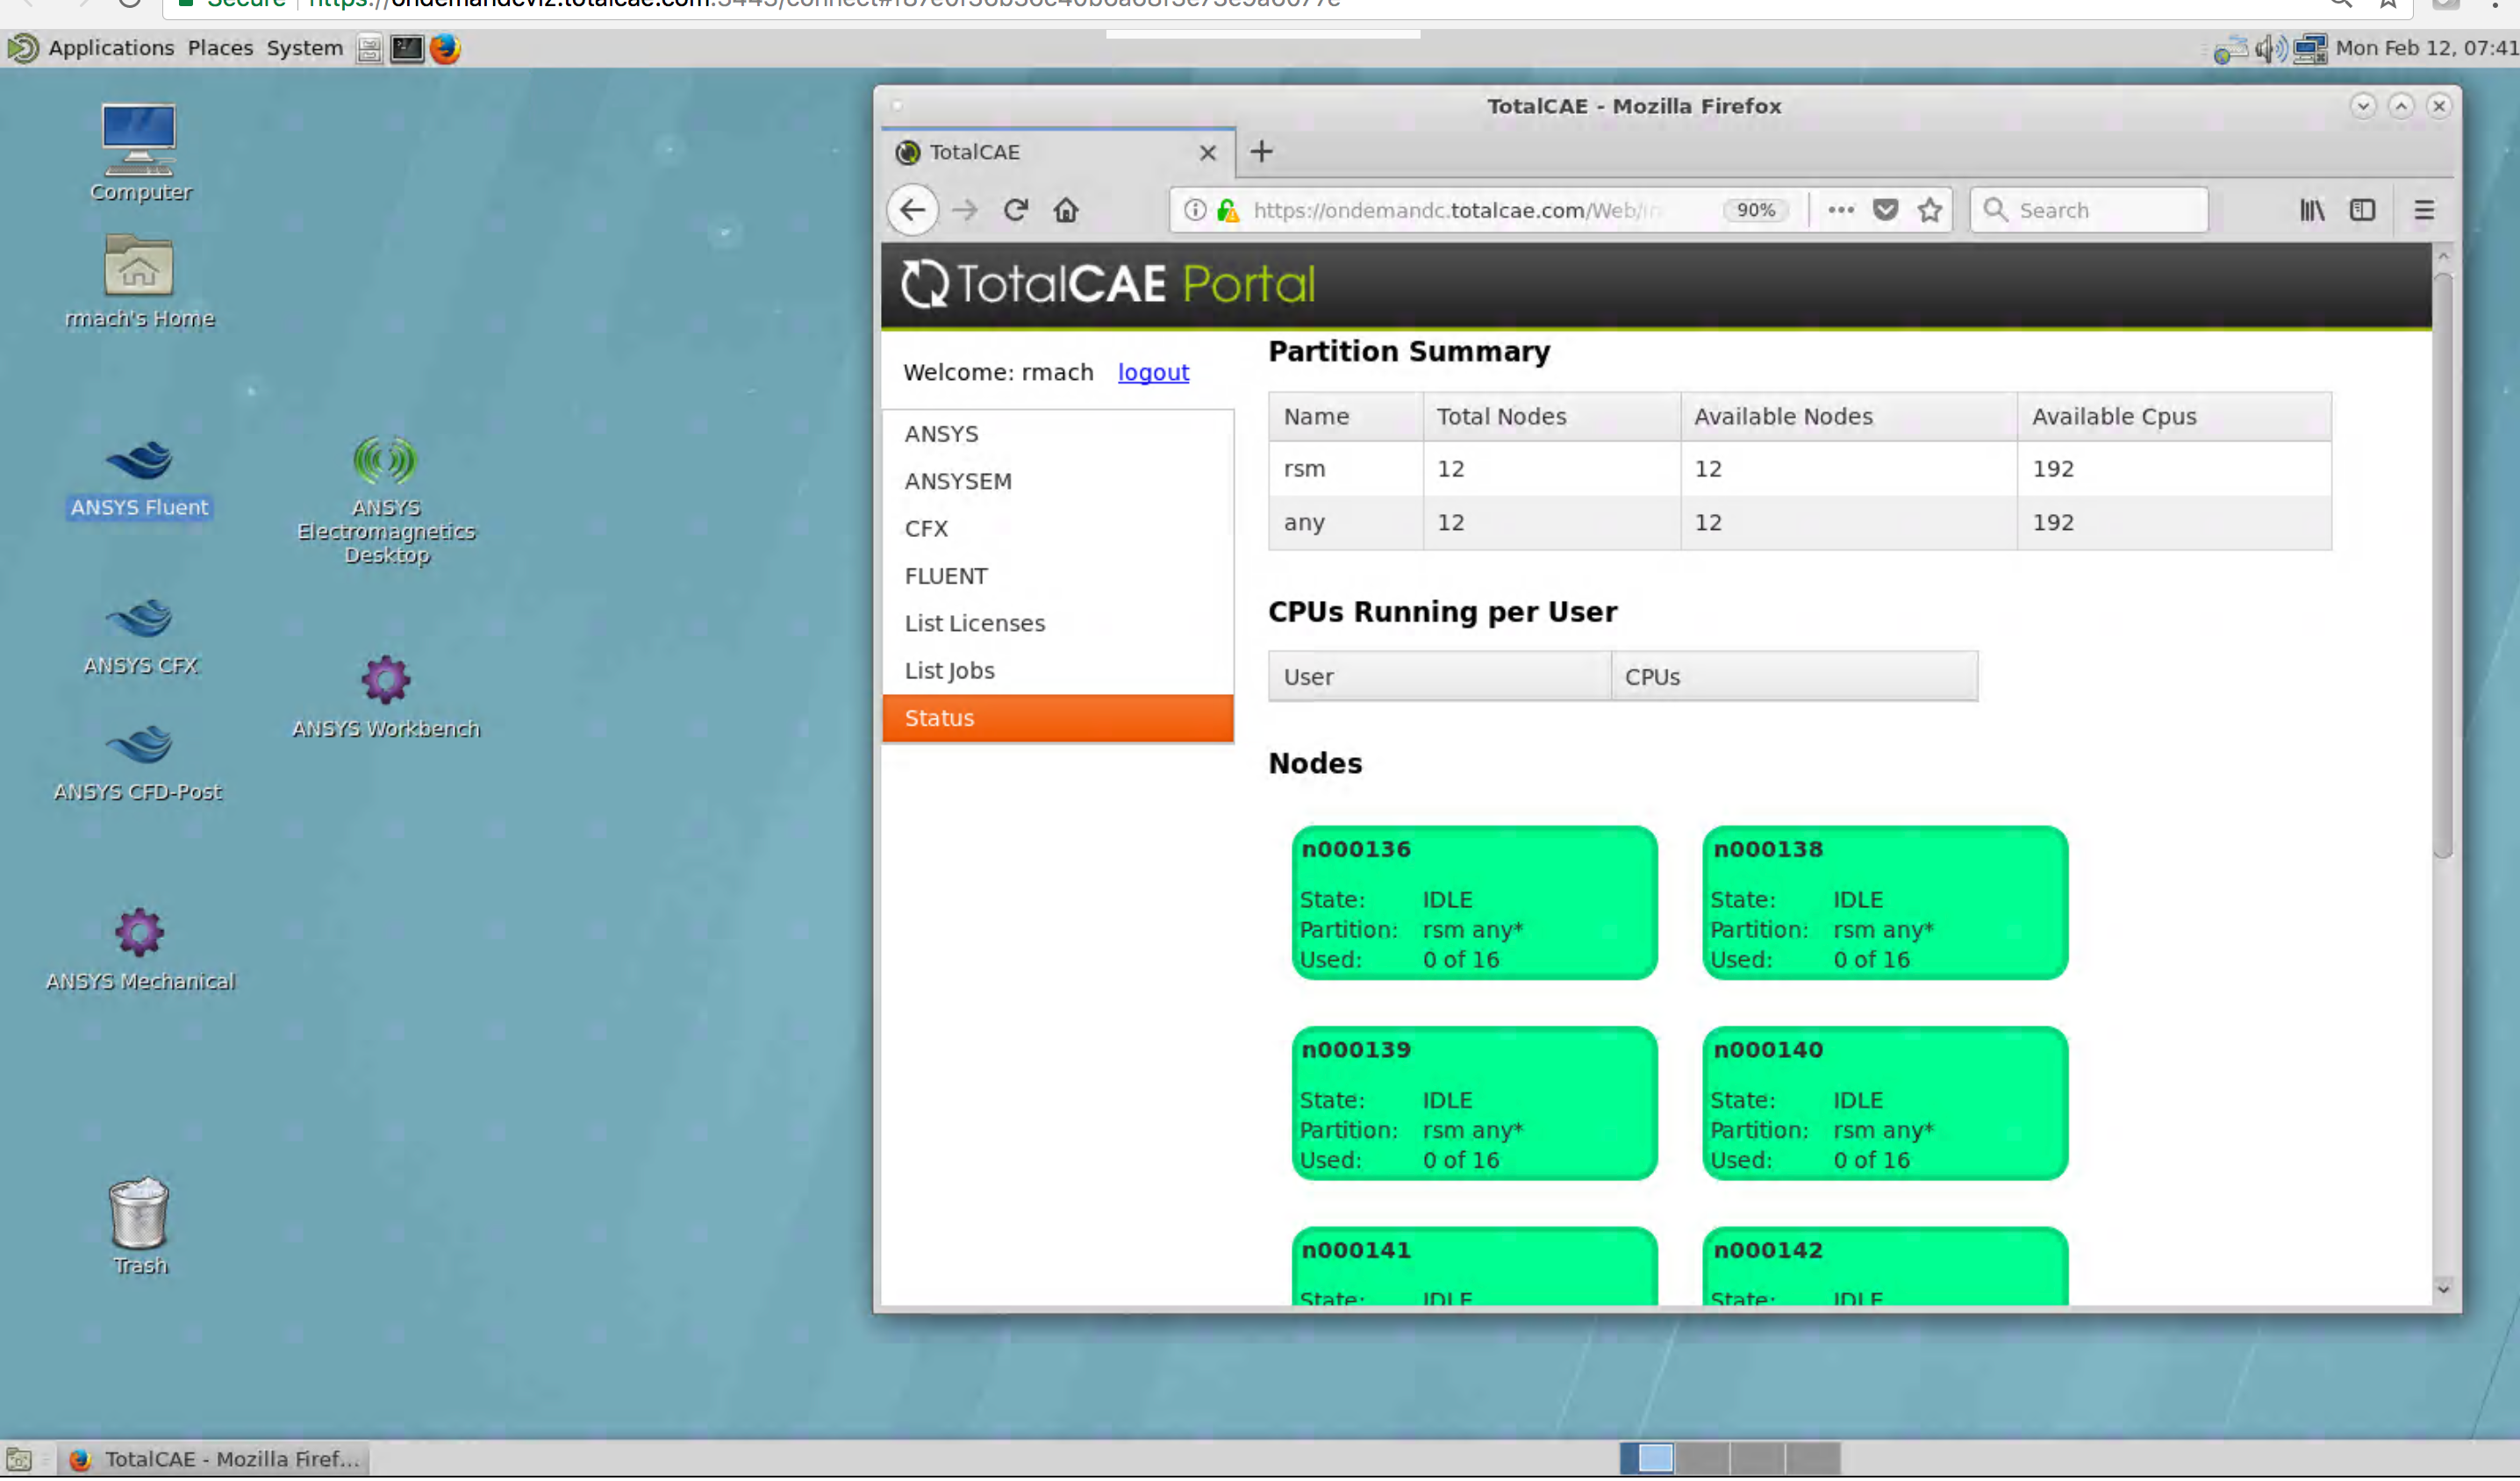
The high level steps to do post processing on the TotalCAE Viz Server:
- Login to the TotalCAE Visualization Server with Chrome from your Windows or Mac, and click on the “ANSYS Workbench” icon on your Desktop
- Use ANSYS Workbench to load your model/results. Note your results are in /work/<username>
Submitting ANSYS Mechanical Jobs with ANSYS Workbench and RSM
Some customers prefer to use ANSYS Workbench with Mechanical, and submit jobs through ANSYS Remote Solve Manager (RSM). ANSYS RSM is configured as part of the HPC private or public cloud, and your user account already has been configured to use RSM through the TotalCAE Viz Server.
The first step is to login to the TotalCAE Viz Server, and click on the “ANSYS Workbench” icon on your desktop
That will bring up the ANSYS Workbench GUI. I have dragged over a Mechanical component, right clicked and imported my data files already.
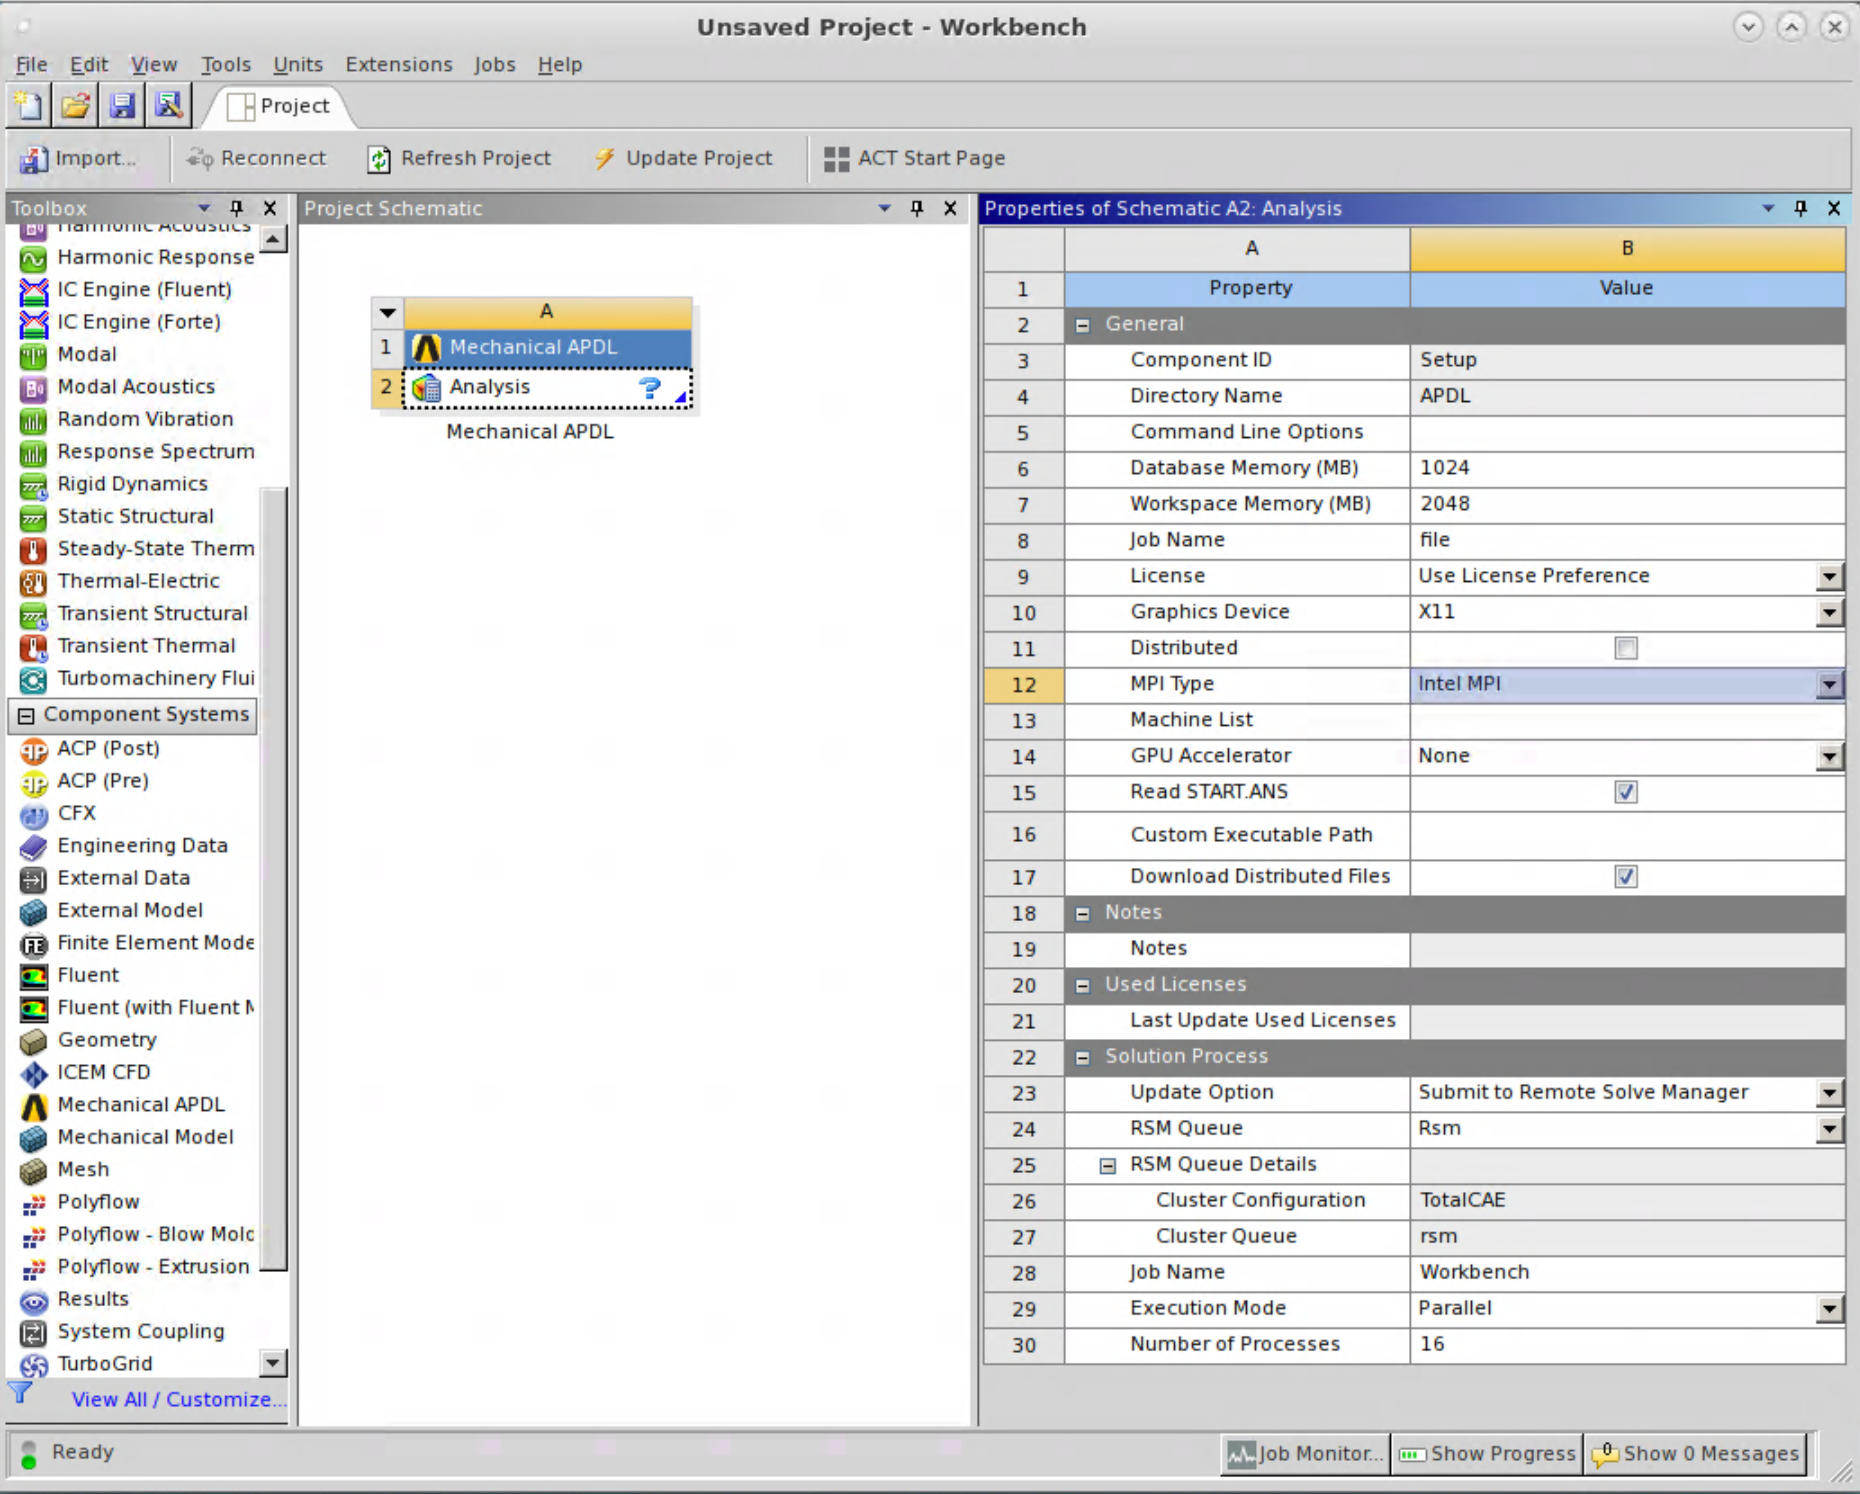
Click on “Update Option” and choose “Submit to Remote Solve Manager”. The settings should automatically fill in. You will need to change execution mode to “Parallel”, and fill in the number of processors you want to run on (in this case 64). Specify “Intel MPI” for MPI Type ( change from default) as above if on Azure.
To submit, right click Solution and choose Update. ( You may need to first “Clear Generated Data” via right click on Solution first.)
Click on the “Job Monitor” in the lower right to monitor RSM submission. Once completed you can right click on Solution and choose to view solution monitoring or post process.